Virophysics HOWTOs
Listed here are info, scripts, and files for a few of the resources commonly used by members of the Virophysics group:
LaTeX
In the Virophysics group, all research write-ups (papers, posters, slide presentations) are done in LaTeX. Here are a few useful resources. First, you should buy yourself the wonderful Guide to LaTeX by Kopka and Daly. When you don't have it handy, you can consult the online Wikibook on LaTeX which is a very complete online LaTeX resource. If you can't remember the LaTeX code for a particular symbol, then the most awesome tool is detexify which allows you to draw the symbol (with your mouse or stylus) and it will give you the LaTeX command for it. If you're getting started and you'd like info that is more substantial than what I have here, you should check out Shawn Lankton's LaTeX page.
Compiling LaTeX documents
When compiling your documents, if you are sick of having to type pdflatex myfile.tex; bibtex myfile; pdflatex myfile.tex, etc. every time you compile your LaTeX document, you will find the following very useful. It is a rule file, called LaTeX.Rules allowing you to define a Makefile for compiling LaTeX documents, and replacing the repetitive typing of the above commands with just make. In the directory where myfile.tex is located, you create a Makefile containing the following lines:
|
DOCUMENT := myfile LATEX := pdflatex # or latex if you prefer include /path/to/LaTeX.Rules |
and you can now type make and it will take care of the rest. You can read more about it on the developer/maintainer's page HERE.
Ryerson thesis document class
To make things simpler for undergraduate and graduate students alike, I developed a Ryerson Thesis Document Class (RUthesis.cls) which is based on a class developed by several generation of UofAlberta students. You can look at a sample undergraduate or graduate thesis, or you can download the files that were used to produce these examples (ugrad-thesis.tar.bz2 and grad-thesis.tar.bz2), or you can browse all the files here. I have also recently learned someone else at Ryerson has developed a thesis class: check it out here.
Slide presentations
For slide presentations, there are several options. My personal favorite is pdfscreen, but the most popular one now is probably beamer. Just Google those up and you'll find examples and tutorials for both.
Posters
For posters, I have looked around and there are a few options, but none was quite what I needed so I made my own stylesheet: pdfposter.sty. It is actualy a modified version of something I found a long time ago on someone else's site. It is based on the LaTeX article class, it is flexible in that you can adjust the aspect ratio and the number of columns of textboxes, and it works with pdflatex. Here is an example poster:
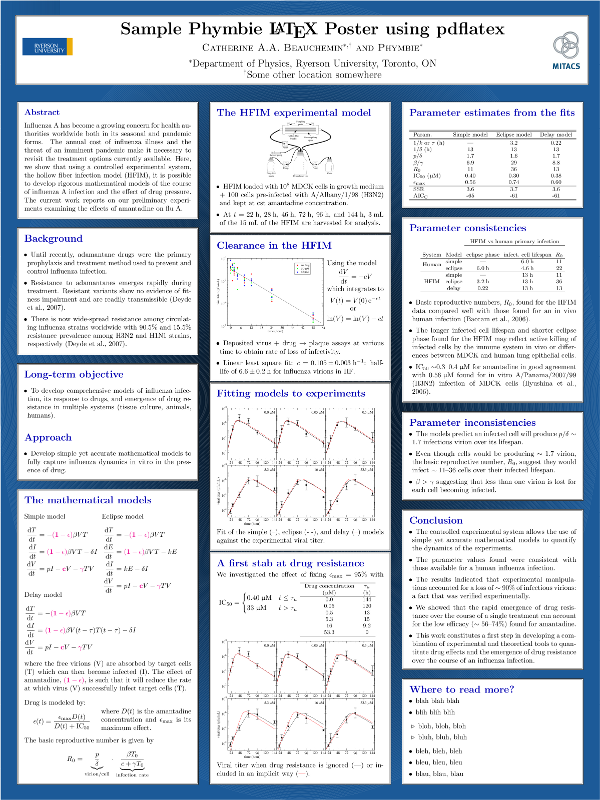
You can download the actual PDF poster, pdfposter.pdf, or get the full source needed to reproduce the poster, pdfposter.tar.bz2, or even browse the directory containing all the necessary files here. The source code actually produces a PDF that is 12" wide by 16" high (as specified using \postersize{12in}{16in}). What I typically need is a poster that is 3 feet wide by 4 feet high (36" x 48") and this is done by rescaling the poster at printing time through the "Page setup..." or "Print setup..." menu when printing from your favorite PDF viewer/editor.
Phymbie bootcamp
This set of exercise is meant to prepare you for the set of tasks that come up a lot when you work in the Virophysics group, namely using pythong for model-solving and data fitting with scipy and numpy, data plotting with (matplotlib), and reporting results in (LaTeX).It might be worth first spending some time getting your computer setup to use python (scipy, numpy, matplotlib) and LaTeX. Note that both python and LaTeX are available for Windows, Mac and Linux.
If you're going all out, I would recommend you install a debian-based operating system (Debian, Ubuntu/Kubuntu, Minty) on your computer because your work computer in the Virophysics group will only be running debian-testing. If you decide to go this route, be sure to install all of these packages (the file lists their Debian name: name might be different for other distributions).
Now, get familiar with these tools by going through a set of things we do commonly:
- We primarily use scipy and numpy (similar to MATLAB) for simulating our models. I would recommend you go through a tutorial or two (e.g. there are tonnes of them online) and enter the commands in python as you go.
- Read this paper by Baccam et al. It presents the simplest model for influenza and has a few patient data set which you will fit as part of your prep work. Reading the paper will also allow you to learn some basic things about flu and viral infections in general.
- When you are done reading/understanding the paper and feel comfortable with python's numpy and scipy, write a python code that will use numpy to read in the patient data of Table 1 in the paper from the file baccam.txt.
- In this same script, now use the function scipy.integrate.solve_ivp to solve the ordinary differential equations (5)-(8) in the paper for the parameters in Table 3 in the paper.
- We primarily use matplotlib for plotting. Please use matplotlib to reproduce the 6 plots in Figure 1 of the Baccam paper (for the model with delay only) with the parameters in Table 3. Make the plots look as identical to those in the papers as you can (graph labels, line colours, etc.).
- If things are going well so far, now use scipy.optimize.leasq or scipy.optimize.fmin or a similar function to fit the model to the data, i.e. to find the parameters set (p, beta, c, ...) that gives the best fit. Basically, you will need to write a function that you will provide to leasq or fmin. The function should solve the ODE for a given parameter set, and return the sum of the squared residuals (SSR) or difference between the log10(virus) of the data and your model to the fmin or leasq functions. These functions will do the work of finding what parameters minimizes the SSR. If you look for "ODE parameter fitting with scipy" online, you should find plenty of help. This is the hardest bit... hang in there!!
- Great! Now, for each patient, you should have found the set of parameters (p, beta, c, etc.) that best fit the data. It might not match the best-fit parameters in Table 3 of the paper, but the plots should look just as good. You can plot your new results together with your previous results for the paper's parameters to compare.
- We use LaTeX to typeset everything we do. Once you have completed fitting all 6 patients, and have reproduced the 6 plots using matplotlib, create a very short LaTeX report (a page is fine) to report the result of your fit with very little text but be sure to include the equations of the model you fit to the data, a Table (reproduce Table 3 with your parameters, which might differ) and a Figure (reproduce Figure 1).
- Congratulations! You have now acquired the basic skills you will use almost daily in the Virophysics group.
By the way, if you would like to familiarize yourself with basic bash commands, you could check out this online tutorial.
Using HTCondor on phymbie computers
On the phymbie installation of HTCondor, dororo is the Central Manager (which matches submitted jobs to execute machines) and the only Submit machine (where users log in to submit and check on their jobs).Submitting jobs
Say you normally run your code as ./run_this myarg, which you would run from the directory where run_this is located and/or where you want run_this to read from and/or return data file(s). You can submit your job to the HTCondor queue from that same directory (while logged into the Submit machine, dororo) as follows:
condor_submit run.sub
where run.sub is the name of your job description file which could look something like:
	   # An example submission

	   universe = vanilla

	   getenv = True

	   executable = run_this

	   transfer_input_files = mylocalmodule.py

	   request_cpus = 8

	   output = out.$(process)

	   error = err.$(process)

	   log = log.run_this

	   # a first job

	   arguments = myargA

	   queue 1

	   # a second job

	   arguments = myargB

	   queue 1
This actually submits 2 runs (creates 2 HTCondor $(process) IDs) as 1 job (creates one $(cluster) ID), and it is equivalent to manually running
	   ssh machine1; cd working_dir

	   ./run_this myargA > out.0 2> err.0 &

	   ssh machine2; cd working_dir

	   ./run_this myargB > out.1 2> err.1 &
except that now HTCondor will decide what computers will be used to run your 2 processes and will report on the status of both in the file log.run_this. Argument are the same for both processes queued unless they are overwritten, e.g. arguments appears again after the first job is queued but before the second one is, but executable appears only once so remains the same for both jobs queued. Because output and error use the $(process) variable, this will be replaced by the run's $(process) ID so even though these are specified only once, they expand to a different value for the 2 runs queued.
-
universe = vanillais the default for phymbie's HTCondor installation, but it's good practice to always specify it in your script.
-
getenv = Trueensures that your environment variables (like PYTHONPATH) is used/set for the job(s).
-
transfer_input_filesis a good way to list any files that your code will expect to need, e.g. a local (not globally installed) python module thatrun_thisimports viaimport mylocalmodule.
-
request_cpusis used to specify how many CPUs each of your runs will use-ish. If left unspecified, the request is for one CPU for each run. Most of our computers have 4 cores, 8 threads, so HTCondor consider these machines to have 8 slots (hereafter called CPUs) to which it can assign jobs. If a run requests 8 CPUs, it will only run if/when an 8-CPU machine becomes fully available (all slots free); and once that run launches, no other run can run on that machine, even if your run doesn't use all CPUs in the end.
HTCondor does not check that your run uses only or all of the CPUs it requested. If you submit a request for 8 CPUs, but your run spawns 12 threads, the run will still launch when an 8-slot machine becomes available and will still spawn 12 threads/processes. Generally, for our types of code, it's best to spawn more threads (i.e. pools or processes) than the computer has.
Generally, you should also under-request the actual # of CPUs you need, e.g. if your code uses 4 threads most of the time, but sometimes needs 8 threads, you should request just 4, i.e. it's better to over-work the CPUs than to leave them unused.
Checking on your jobs
In addition to the output, error, and log files, you can check the status of your job with the following commands while logged in on dororo:
	   condor_q -nobatch

	   condor_q -analyze

	   condor_userprio

	   condor_ssh_to_job 30.1
You can type these and see what you get. In condor_ssh_to_job, replace 30.1 with your job ID number. This command ssh's you into the computer that is running your job. You can find with the condor_q -nobatch command.
More questions?
For full information about using HTCondor, checkout the project's Quick Start Guide, User Manual, and HowTo recipies.Last modified: December 03, 2020, 21:24.
Webmaster:
